

$24.99
Domestic
Shipping
Orders between $0 and $50
$54.99
Domestic
Shipping
Orders between $50 and $250
$99.99
Domestic
Shipping
Orders between $250 and $1,500
FREE
Domestic
Shipping
Orders between $2,500 and $10,000
Additional restrictions and limitations may apply. Please visit our Terms & Conditions Page for full promotion details!

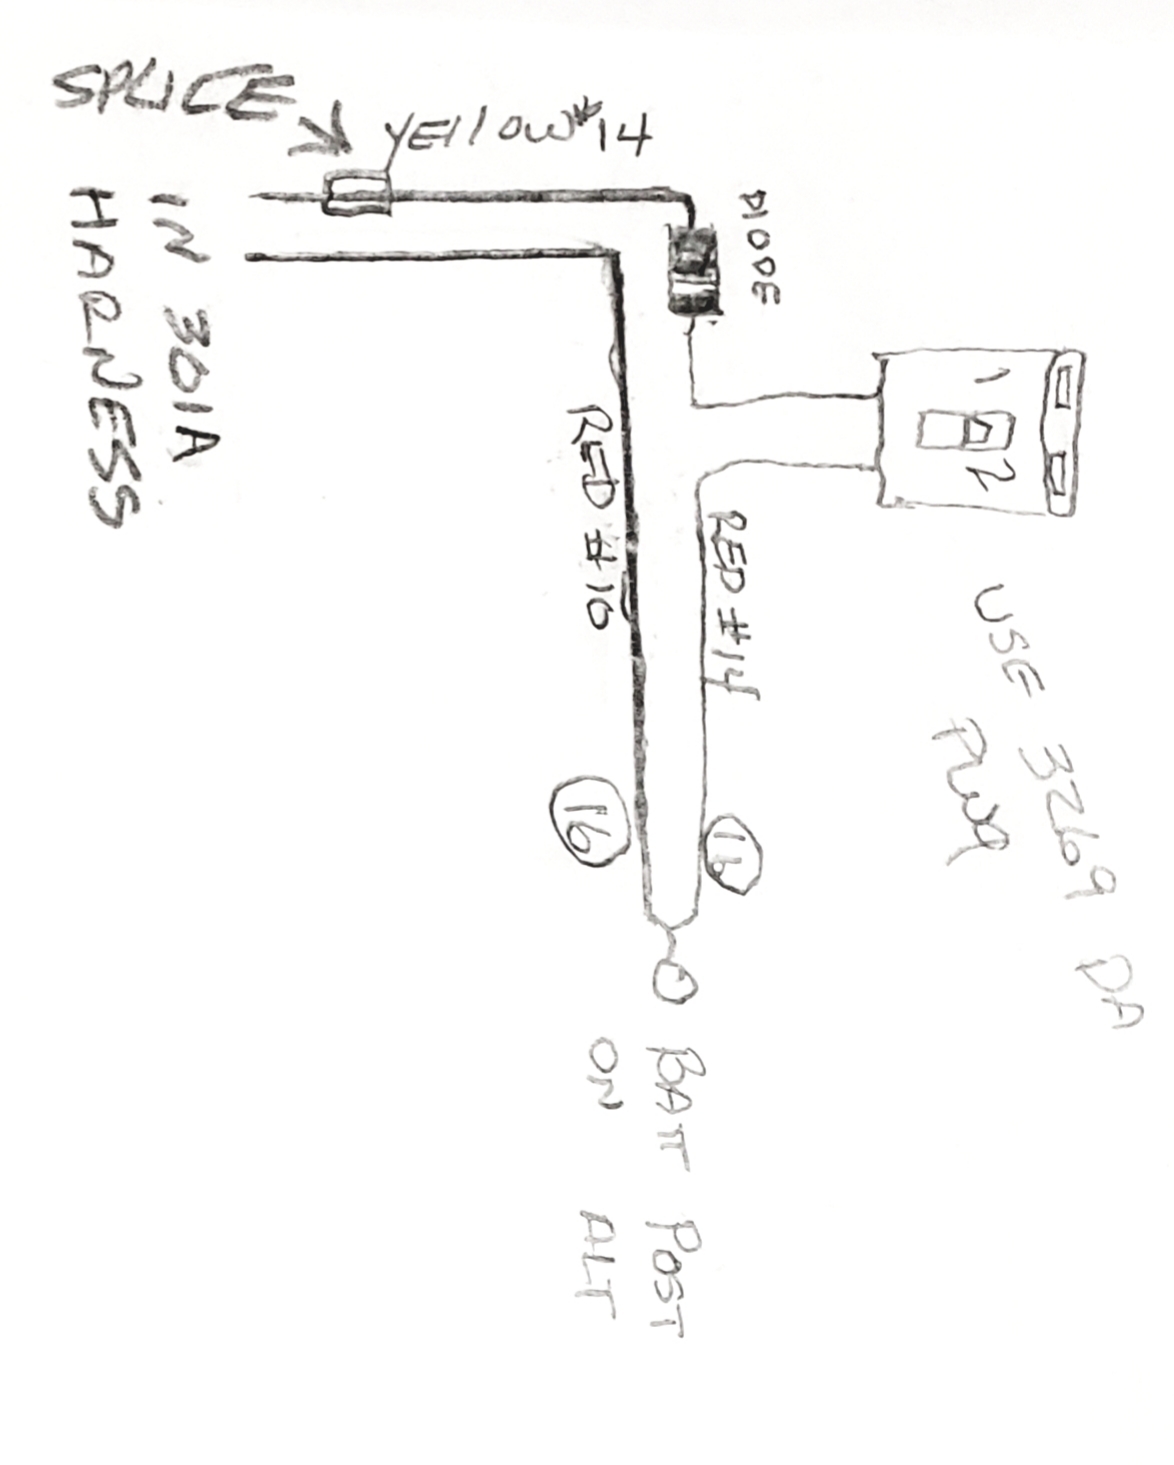
Da Plug, Use With Alt & Stock Ignition Switch
Part Number: 3269
This item is out of stock and is being back ordered.
Back ordered items can still be ordered and are automatically shipped when they come in.
USA made DA PLUG INSTALLATION INSTRUCTIONS
Because an alternator produces electrical current at idle (where as a generator does not) if you were to turn off the key (with the alternator installed, and no DA Plug) the engine would still keep running, because there is still electrical current reaching the ignition coil from the alternator.
SHRINK-WRAPPED BUMP -- in the DA Plug harness is what allows your engine to be turned off with the original ignition key. (No we are not cheap and splice the wire there...)
Step 1
Begin by removing the positive battery cable from the battery. Next remove the (BATT) wire, from the external voltage regulator (or cutout) and connect it to the (10/32) stud on the back of the alternator. Use 10-gauge wire for this connection
Next.... Remove and tape (using electrical tape) the remaining wires (leftover from the old voltage regulator) back into the original wiring harness. (That way everything will be there in case the next generation wants to do a 100-point restoration) Finally... remove the old voltage regulator.
---------------------------------------------------------------------------------------------------------------------
POSITIVE GROUND -- If you vehicle was originally positive ground (the battery ( ) cable connected to ground) you need to reverse the cables on the battery to match the polarity of your new alternator. The (-) battery cable will now go to ground. The ( ) positive cable will become the %u201Chot%u201D cable.
Part Two - reverse the two wires on the back of the amp gauge or in the case of Fords; reverse the loop of wire on the back of the gauge. This will make your amp gauge read correctly. (If you fail to reverse the wires on the amp gauge nothing bad will happen, your gauge will just read backwards...) The only exception is 1939-1940 Fords that use a Buss Bar type Amp Gauge. DO NOT change anything and this style of Amp gauge will work fine.
---------------------------------------------------------------------------------------------------------------------
Now snap the DA Plug, into the top of the alternator. The red wire (with the ring terminal) attaches to the same (10/32) stud on the back of the alternator that you attached the (BATT) wire too. The yellow wire should connect to the ( ) terminal of the ignition coil or the (I) terminal on the ignition switch. In some applications it may be easier to connect the yellow wire to the (S) terminal on the starter solenoid. Now reinstall the positive battery cable, check all of you connections to be sure they are tight, and you are finished.

Unless otherwise noted, our parts fit only these applications:
- Electrical
- 12 volt, negative ground
- Bed
- 6½ foot flareside (a.k.a stepside)
- Body Style
- F-100, F1